 AWeber is an online email management tool. It allows you to compile a list of website subscribers, manage that list, send them emails and to automatically message them when you post new blogs.
We make great use of AWeber for all of our websites, and we think that you will find it very useful for your pet blog too.
In this article you will find detailed step by step instructions of how to set up and get started with AWeber.
How To Set Up An AWeber Account
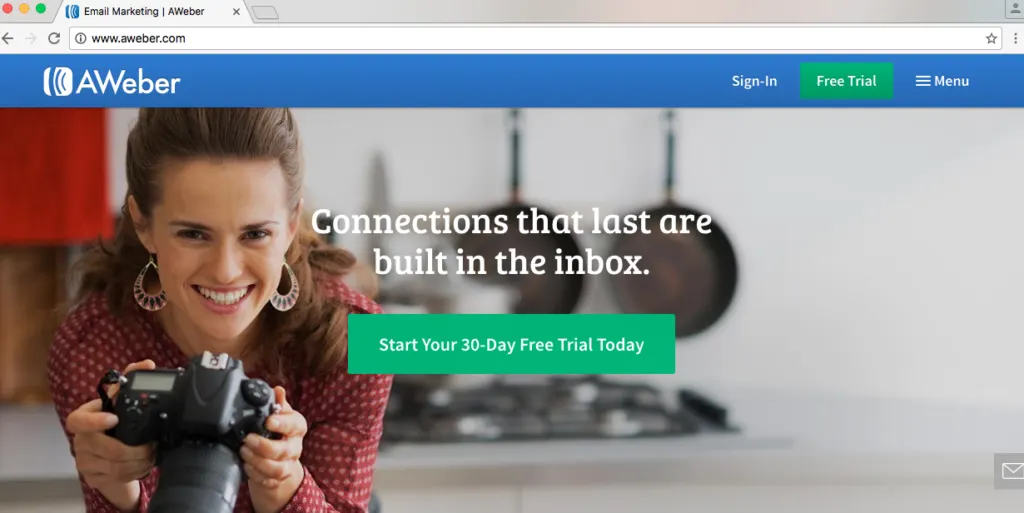
Type www.aweber.com into a new browser window.
Click on the button labelled “Start Your 30-Day Free Trial Today”
A page will appear for you to enter your contact details.
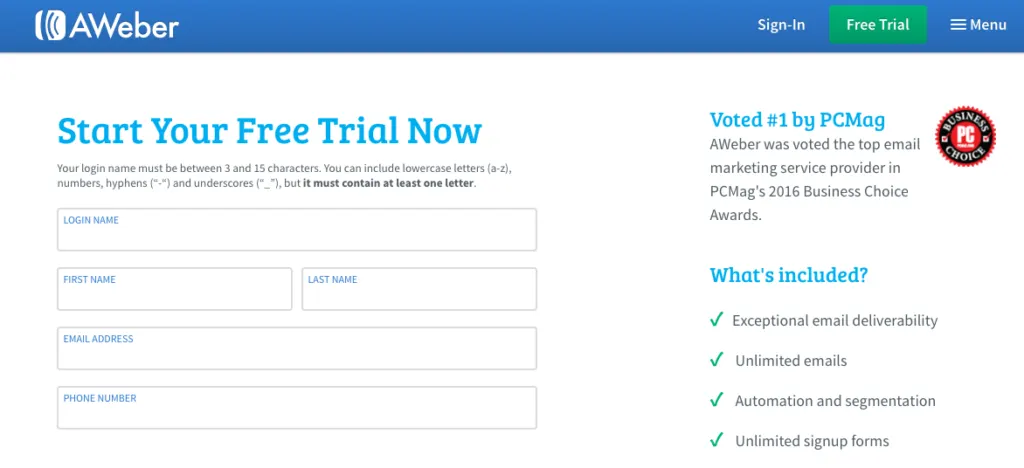
In the first section choose a login name. Make sure it is something that reflects you as a company or an individual, and not your website alone.
This way it won’t seem disjointed if you decide to add further websites in the future under the same account.
Make sure you make a note of your login name and the email address you have given for your future reference.
Scroll down the page and you will find further information requests. The next is for billing information.

Make sure that you get the billing information right, with your name as it is shown on your card, as it will be used to attach to your debit or credit card. (Don’t worry, you won’t be paying unless you decide to later on when the list grows!).
Next you will need to enter your credit or debit card information.
This is for their ease of transition if you decide to subscribe after the free trial. You won’t have any obligation by signing up to your trial, and they do need these details to accept your account.
The next section down the page will encourage you to make a payment now. Obviously this is your choice, but in this example I will be choosing to begin with the free trial. I suggest you do the same at this point.

Next you will find a service agreement, with a link to follow if you want to read it through before agreeing. Although such things can be really dull, I do advise scanning through it for your peace of mind.
When you are ready to proceed simply click on the green “Start My Free Trial” button
You will now be taken to a welcome paid, and informed that an email has been sent to you with the same information. It will give a summary of your details and the scheme you have selected.

If you have decide to go with the free trial, write a note in your diary for 25 days time to cancel the subscription if you are unhappy.
There is a note to inform you that you are being sent a password to your email account.
Shrink your browser window and go to your inbox and check that two emails have arrived.
Make a note of your password along with the login name and email address you recorded earlier.
Go back to your browser and click the green “Sign In Now” button at the bottom of the page.

You are now ready to log into AWeber and start creating your subscriber lists!
Enter the login name and password and click “Login To My Account”

You are now logged in to your new AWeber account.

You have the option of working through the video tutorials linked on the first page by clicking the play button. If you have not used email subscriber software before I recommend that you do so.
If you are ready to get going, then click on the blue “Let’s Get Started” button below the video.

How To Create An AWeber Subscribers List
You are now ready to set up your first email subscribers list. This should be tailored towards the individual website that you are looking to promote.
Enter your company name, which will be the title of the site, and it’s website url. A little tick will appear at the end of this box if AWeber is happy that the url is correct.
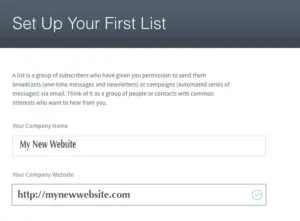 Scroll down the page to see your address details.
This part is important.
This is the address that your website’s subscribers will see when you email them.
US law regulates commercial email, such that you have to have a valid postal address (or P.O. Box) when sending out bulk emails.
If you do not want your subscribers to know where you live, you will need to put in your business premises address or set up a P.O.Box.
I would not personally ever attach my home address to any work correspondence, and recommend that you also take this precaution.

Scroll down further to decide what sender name and email address should be attached to your subscriber emails. Again, remember that this will be shown to everyone who receives it.

The sender name should be your website’s title. The email address should be one which reflects the website, not your own personal account.
AWeber recommend that you use a personal domain based email address, simply because many email providers are more likely to class emails from gmail or hotmail type addresses as spam.
Using an email address with your domain will hopefully improve your subscriber open rates.
When you have input the information, click the blue “Next Step” button at the bottom of the page.

You now need to give further details of the email list you are going to produce.
Give your list a general name which applies to the website.
It could be ‘my website’ or ‘my website subscribers’ for example.

Scroll down to enter a description of the purpose you are going to use this list for.
If it is going to be used to send blog updates automatically, or relevant email messages about the topic area, then stick to something general and very brief.
Remember to be professional. Check your grammar and spelling. This will be seen by your future subscribers, who will want to feel confident in giving you their personal email address.
When you have entered your details click “Next Step” to go on to the following page.
The next step is to set up an automated confirmation email. This is a message which will be sent to anyone who provides their email address to the list.
The template is absolutely fine to be used here, as it is a short standard confirmation.
Check that the dropdown box has “confirm your subscription selected”

Then scroll down the page and click the green “Approve Message & Create List” button.
Once your list has been approved AWeber will invite you to make a sign up form.
How To Create An AWeber Sign Up Form
A title page will appear, to let you know you’re about to make a sign up form.
This is a form which you can put into your website to allow your readers to join your email list. It is one method of gaining subscribers.
You can link to it from your social media pages or from posts, pages or even the menu bar of the website itself.
Click on the “Create Your First Sign Up Form” button to proceed.

For your first sign up form, keep it really simple.
Scroll straight past the info at the top of the page

And stop when you get to the templates section shown here

Under the word ‘Templates’, click on the tab labelled ‘Popular’

Click on the template labelled ‘Foodie’.

This will bring forward a copy of the template. You can choose between three color schemes. Select the one which best matches your website.
Click “Load Template” at the bottom of this box.
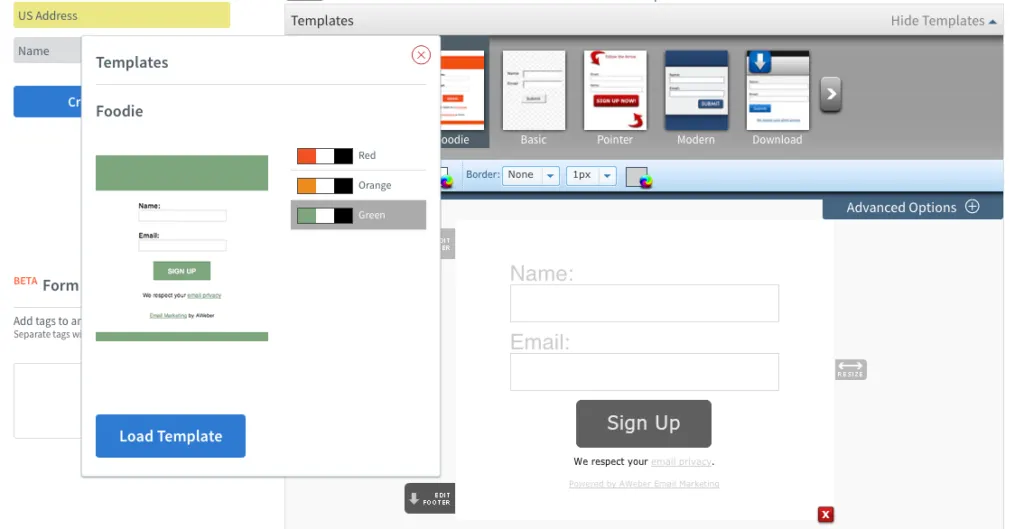
Just above your template are some drop down menus. From the one labelled ‘Form’ select ‘Body’.

Keep the remaining settings the same, and click on the green “Save Your Form” Button.

The page will reload – then scroll down the page and click on “Go To Step 2”
You now need to look at the upload method for your form.
Select “I Will Install My Form”

To install your form onto your website you will need to use the Javascript Snippet.
Highlight everything that appears in the copy/paste box and copy the text.

Open a new browser tab and log into the dashboard of your website.
Create a new Page. Give your Page the title “Email Newsletter Sign Up” and open the ‘Text’ tab.
Click onto the page and paste in your javascript.

Click on the ‘Visual’ tab. You should just see a small play symbol. Don’t worry, this isn’t how it is going to display.

On the right hand side of the page, under the word ‘Publish’, click ‘Save Draft’ then click ‘Preview’.

A new tab will open with the preview page. Check this looks like the picture below

If you are happy then click the blue ’Publish’ button.

Your email subscriber list is now ready to go!
To check that everything is working correctly click “View Page” at the top of the page.
Enter your name and personal email address into the sign up form and click “SIGN UP”
The following page should appear

Go to your email inbox. You should have a new email entitled “Confirm your subscription”. Open this email and follow the link.

A browser window should open with the following message

Now go back to your AWeber window, and click the heading “Manage Lists” at the top of the page.

You should see your new list, and it should have 1 subscriber

On the menu bar click on “Subscribers”, and go to the dropbox tab labelled ‘Manage Subscribers’

If you were successful you will see your details listed on this page.
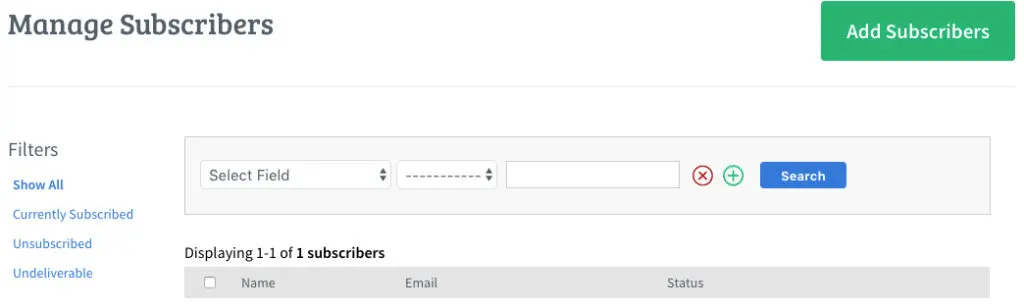
Congratulations! You now have a subscriber list and a subscriber form that you can send your readers to.
You can use this AWeber list in conjunction with some other software, to help even more people sign up to your email list. We will be looking at Thrive Leads in another post soon.
Leave a Reply